What Are the Top Types of TR Fret Clamps?
Choosing a fret clamp is not just a matter of applying pressure. The right tool can help seat a guitar fret evenly while reducing movement across the fingerboard. Different designs suit different repair tasks, neck shapes, and access needs. Small details matter. Jaw shape, throat depth, contact pads, and adjustment range can all affect control.
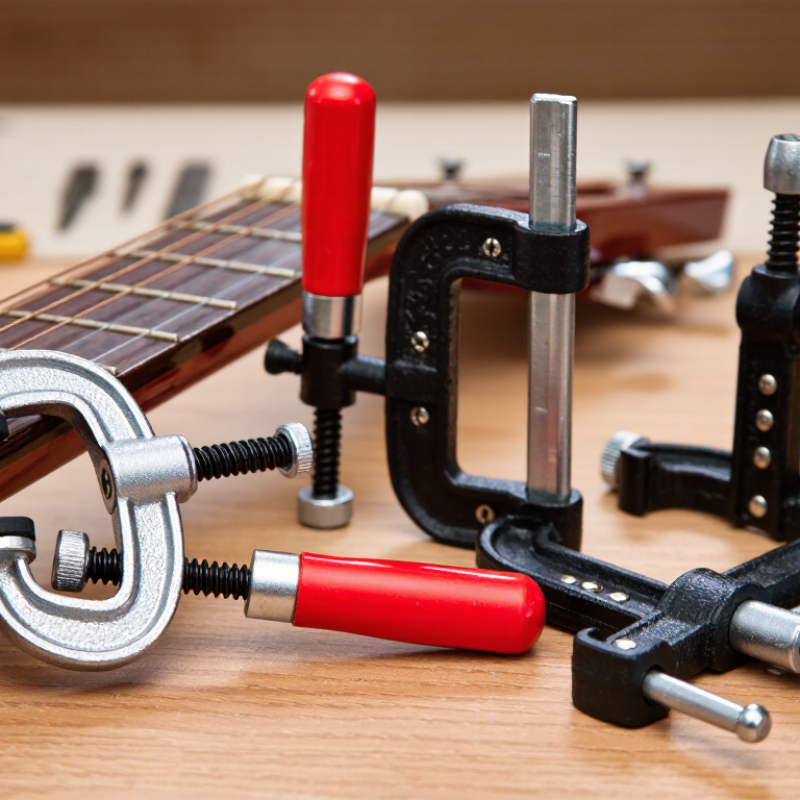
This guide looks at common types of TR fret clamps, including screw-adjusted, cam-action, and specialized press-style designs. Their names and features may vary between manufacturers, so compare the actual clamp rather than relying on labels alone. A screw clamp offers gradual adjustment; a cam mechanism can make repeated work quicker. Neither is automatically best. Fret size, fingerboard radius, and the condition of the slot should guide the choice. The phrase “Tr Fret Camp” may also appear in searches, but product descriptions and specifications deserve careful checking. A familiar tool can still be the wrong fit. That is easy to overlook.
You will also see what to inspect before use, such as smooth jaw faces and secure alignment. These checks are practical, not fussy. Poor contact or excessive force may damage a fret or finish. The overview is intended to support informed selection, not replace hands-on training. Even experienced repairers reassess their setup. There is room for judgment.
What Defines a TR Fret Clamp?
A TR fret clamp is a tool for pressing a guitar fret securely into its slot while supporting the fingerboard. Its defining feature is controlled, even pressure across the fret crown. A shaped caul should match the fingerboard radius, helping the fret seat without rocking or bending. The clamp also needs enough throat depth to reach the fret being installed. Fit matters. A generic flat jaw may press the center while leaving the fret ends high.
Clamp designs vary in how they apply pressure. Some use a screw handle for gradual adjustment; others rely on a lever or a fret-press fixture. The useful choice depends on access, the fingerboard’s radius, and how often the tool will be used. A rigid frame can improve consistency, but it may feel awkward near the upper frets. That detail is easy to overlook. A clamp does not correct a poorly prepared slot, and excessive force can damage the fretboard or fret.
Tips: Test the caul on an uninstalled fret first. Check that it contacts the crown evenly, then tighten in small increments. Look closely at both fret ends after pressing; a tiny gap can matter. When the fit seems uncertain, pause and inspect rather than forcing it.
How TR Fret Clamps Differ by Design
TR fret clamps differ mainly in how they apply pressure and support the fret. A screw-driven clamp gives controlled, gradual force, useful when seating stubborn fret ends. A cam or toggle design works faster, but its leverage can make pressure less obvious. The caul matters just as much. A radius-matched caul spreads force across the fret crown; a narrow or mismatched one may press the center while leaving the edges high. Small differences matter.
For tight repair spaces, compact clamps can reach near the body joint, though their short handles may limit leverage. Wider throat designs offer access over more of the fingerboard, but can feel awkward around nearby hardware. Grand View Research’s musical-instruments market analysis projected 7.6% annual growth for 2023–2030, a broad demand signal that makes repeatable workshop processes increasingly relevant—not proof that one clamp design is superior. Check alignment with a straightedge, and test pressure on a scrap board when possible. A clamp can still mark the finish if its contact pad shifts. That detail is easy to miss.
Common Types of TR Fret Clamps and Their Uses
TR fret clamps vary by frame, drive, and pressure surface. Screw-operated C-frame clamps suit single-fret repairs because they deliver controlled pressure at one point. Use a shaped caul to match the fretboard radius and protect the wood. Cam or lever clamps release quickly, making them practical for repeated bench work. Pneumatic clamps can speed up production, but need regulated pressure and consistent setup. More force is not always better; an uneven caul can leave a fret proud on one edge.
Clamp choice also affects handling. The U.S. Bureau of Labor Statistics reported 2.6 million nonfatal workplace injury and illness cases in private industry in 2023, or 2.4 cases per 100 full-time workers. This broad figure is not specific to fret work, but it reinforces the value of stable fixtures and comfortable hand positioning. A clamp that slips can damage the board, too. It is a small detail, yet easy to overlook.
Tips: Test the clamp on scrap wood first. Check fret seating along both edges, then adjust pressure in small steps. If the neck flexes, stop and reset the support.
How Clamping Pressure and Reach Affect Performance
TR fret clamps differ in how they apply pressure and how far they can reach across a fingerboard. A screw-style clamp offers gradual adjustment, useful when seating a fret evenly without forcing it. A cam-style clamp works faster, but its pressure can be less finely controlled. Spring clamps are convenient for light holding; they may not provide enough force for a stubborn fret. Use a shaped caul that matches the fingerboard radius, and keep metal jaws away from finished surfaces.
Reach matters as much as force. A compact clamp can fit near the nut, while a deeper-throat design may reach farther across a wide neck or around nearby hardware. Check that the clamp clears the fretboard edges and does not press against the neck’s back. Too little pressure can leave a fret end raised. Too much can mark wood or distort the seating. Small increments are safer. A fret that still sits high may need inspection rather than more force; the cause could be debris or an uneven slot. It is easy to blame the clamp too quickly.